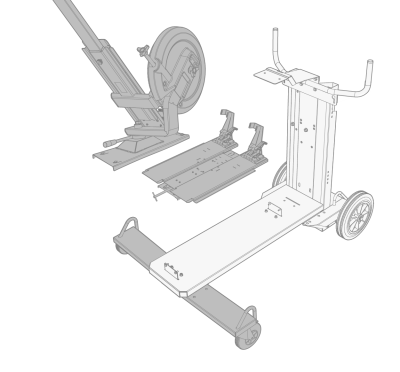
Installing equipment on cart (optional)
The X5 FastMig has two transport unit options: a 4-wheel cart with gas bottle rack and a 2-wheel cart without gas bottle rack. The X5 FastMig equipment can be installed on the cart with or without the cooling unit.
For more information on the connection interface and installing the power source on top of the cooling unit, refer to Installing cooling unit (optional).

|
The equipment installation principle and the bottom securing interface is the same with both carts. Only the top cart connection bracket installation is different. |

|
When installing the full set of equipment stacked as a tower and using the double wire feeder rotating plate or counterbalance arm, always use the broader front roller support plate delivered with the equipment. This applies to the 4 wheel cart.
|
Tools needed:

|
| 1. | Install the cooling unit on the cart. |
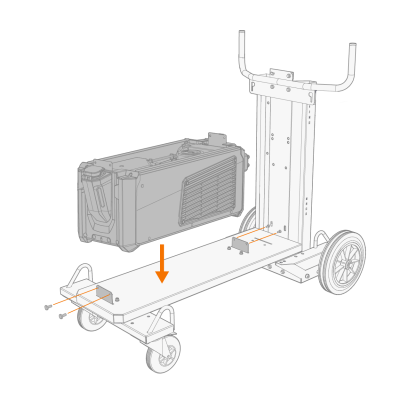
| 2. | Fix the cooling unit to the cart with two screws (M5x12) in the front and two screws (M5x12) in the rear. |
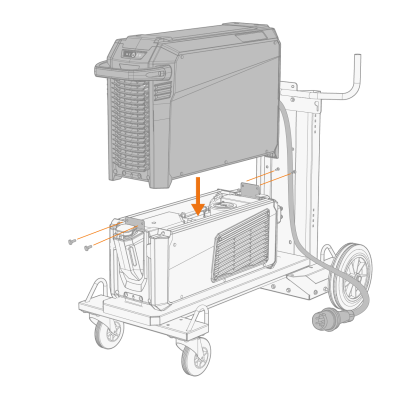
| 3. | Install the power source on top of the cooling unit. Refer to Installing cooling unit (optional) for installation details. |
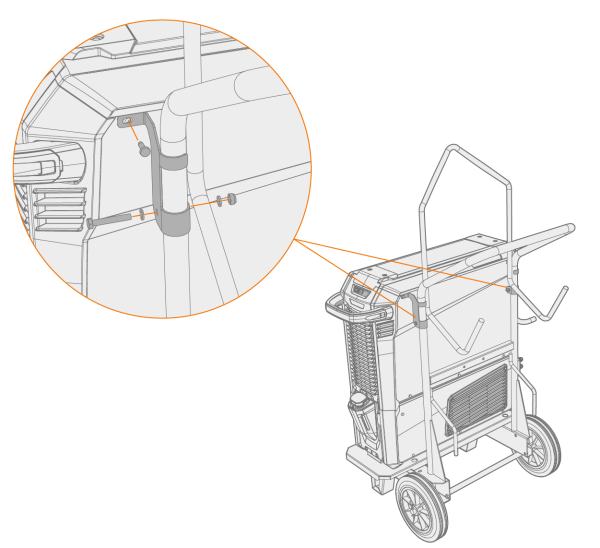
| 4. | 4-wheel cart: Secure the equipment to the cart with the rear connection bracket (rear fixing plate, long). Rear screws: M8x16, top screws: M6x30. |
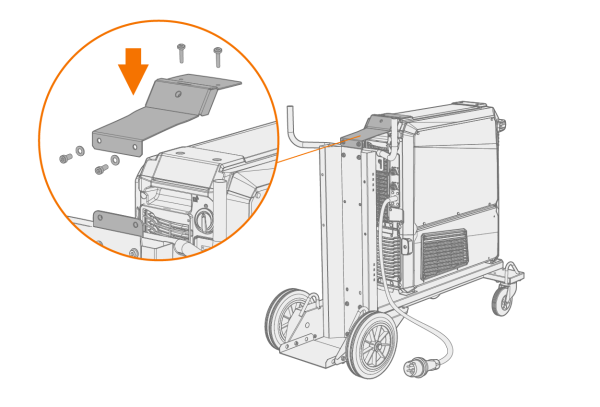
| 5. | 2-wheel cart: Secure the equipment to the cart with the two side connection brackets. |
|
|
The 2-wheel cart's side connection brackets use the X5 power source's side plate top screw holes for securing. Replace the side plate top screws with the ones delivered with the 2-wheel cart side connection brackets. |
For more information on fixing plates and wire feeders, refer to Installing wire feeder with fixed plate.
For lifting the equipment, refer to Lifting equipment.