Installing wire feeder with fixed plate
This section describes the fixed installation of X5 Wire Feeder 300 (on top of the power source).

|
For stacked installation, additional support is required. Read the installation notes here: Installation. |
Tools needed:

|
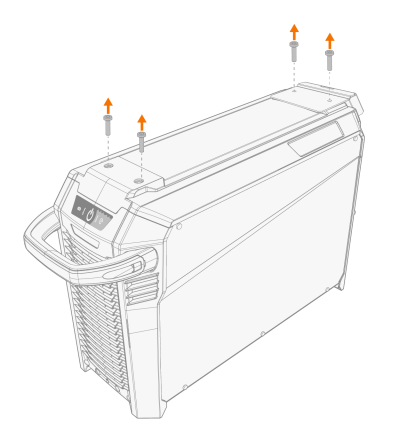
| 1. | Temporarily remove the power source top cover screws. |
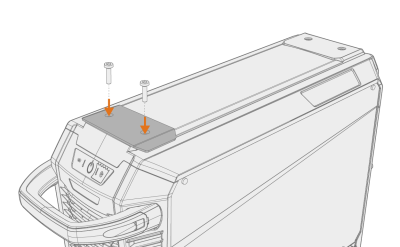
| 2. | Place the front fixing plate on the power source and secure it in place using two of the power source top cover screws (M6x30). |
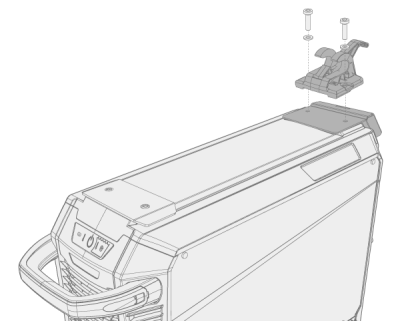
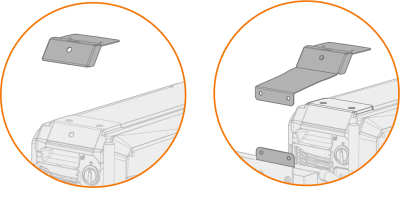
| 3. | Place the rear fixing plate and the wire feeder locking mechanism on the power source. Secure them in place with the two screws (M6x40) provided with the locking mechanism. |
|
|
Depending on your X5 FastMig setup, two different rear fixing plate options are available. Both include an interface for the interconnection cable strain relief mechanism, but the longer one acts also as a cart connection bracket.
|
| 4. | Slide the wire feeder from front to back until the bar in the back locks into the locking mechanism on the power source. |
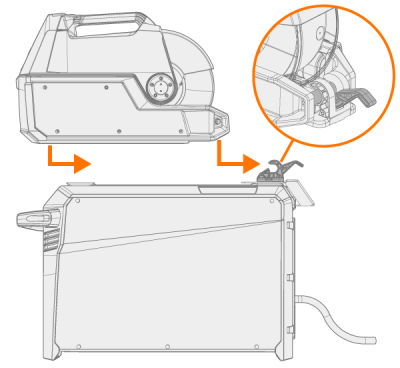
| 5. | Ensure that also the front of the wire feeder is locked in position (to the front fixing plate edge). |
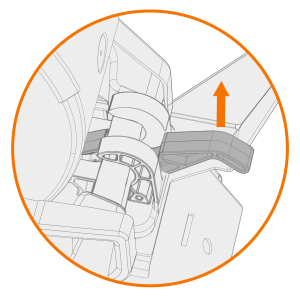
The rear locking is released by pulling the locking mechanism lever: