Installing optional gas cylinder cart
To transport a larger gas cylinder with the power source, install X8 Gas Cylinder Cart. For detailed instructions, see X8 Gas Cylinder Cart Mounting Instructions. If your setup does not include the gas cylinder cart, proceed to Installing optional X8 Cooler.
| 1. | Remove the packaging from the sides but leave the power source resting on the pallet. |
| 2. | Attach a wheel set to the front of the unit. |
>> To have turning wheels in the front and the back, install the front wheel assembly to the front of the unit. For more information, see Installing wheels.
>> To have fixed wheels in the front, install the rear wheel assembly to the front of the unit. For more information, see Installing wheels.
Attach the gas cylinder cart to the rear of the unit:
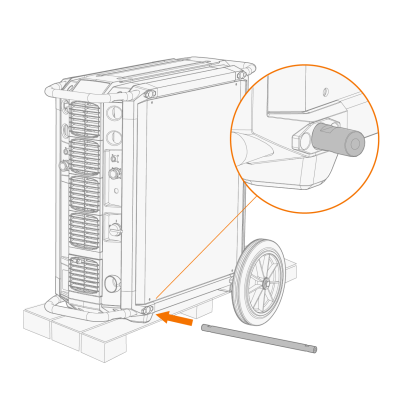
| 1. | Push the axle through the opening in the bottom of the rear side of the unit. |
| 2. | Attach the wheel set of the gas cylinder cart to the axle with a bolt (1) and washers (2, 3, 4) from both sides. |
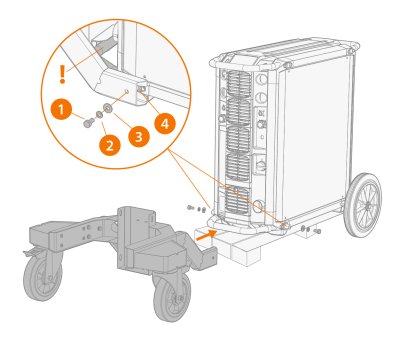
| 3. | Insert cover plugs to the open ends of the wheel set. |
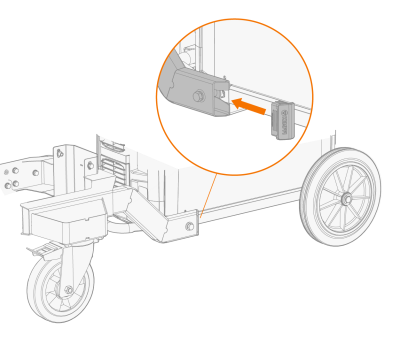
| 4. | Place the upper part of the gas cylinder cart on the wheel set, and push it down until the claw fastens over the transportation handle. |

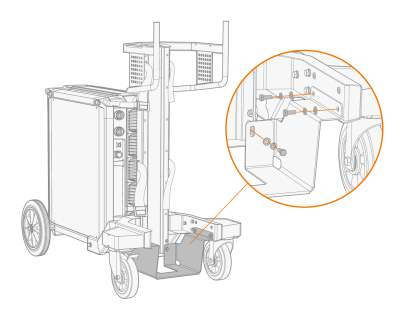
| 5. | Attach the upper part of the gas cylinder cart to the wheel set with two bolts (1) and washers (2, 3) from both sides. |
| 6. | Attach the bottom of the gas cylinder cart to the wheel set with six bolts (1) and washers (2, 3). |
>> The gas cylinder cart bottom has two alternative settings (the lower setting described in the figure). The higher setting gives a better ground clearance, but you must lift the gas cylinder higher.
| 7. | Place the gas cylinder on the cart. |
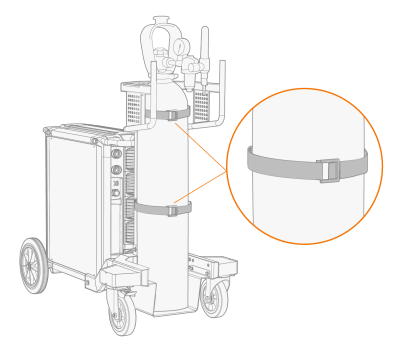
| 8. | Fasten the straps in the cart around the gas cylinder. |