Installing optional X8 Cooler
If your setup does not include X8 Cooler, you can skip these instructions.

|
X8 Cooler must be installed by authorized service personnel. Do not open the covers of X8 Power Source. |

|
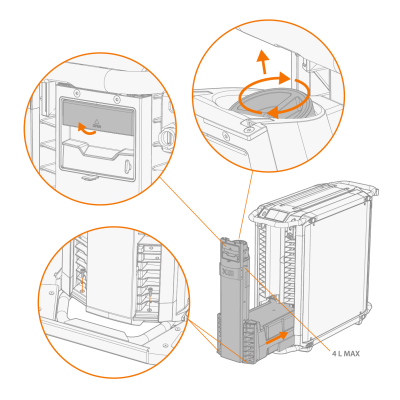
3.
|
Coolant circulation button |
|
6.
|
Connectors for the liquid cooling unit |
Proceed as follows:
|
1.
|
Detach the two screws in the front panel of the power source. |
|
2.
|
Pull the front panel outwards from the lower edge. |
|
3.
|
Remove the lower left cover from the rear of the power source. |
|
4.
|
Push the cooler inside the power source from the opening in the front. |

|
Do not use force, but make sure the connectors on the cooler and the power source are properly connected. |
|
5.
|
Fill the coolant container with applicable coolant solution. For more information, see Filling cooler. |
|
6.
|
Attach the two screws in the front panel of the power source. |