Preparing and connecting welding gun
Assemble the welding gun and connect it to the wire feeder with Kemppi Gun Adapter.
The welding gun has been preassembled by the manufacturer: the wire liner, contact tip and gas nozzle are premounted. For instructions on installing and changing Flexlite GX MIG welding gun parts, refer to userdoc.kemppi.com.
To start using the gun, proceed as follows:
|
1.
|
Check that the wire liner, contact tip and gas nozzle are suitable for the job. Change if needed. If your setup includes a gas-cooled gun, you can also change the neck. |
|
2.
|
Attach the pistol grip handle, if suitable for the job. |
|
3.
|
Attach gun remote control, if suitable for the job (optional accessory). |
|
4.
|
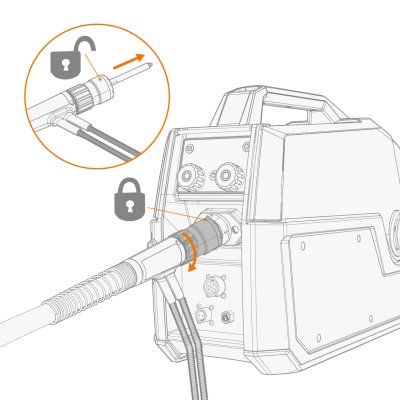
Connect the welding gun to the wire feeder: Push the welding gun connector into the wire feeder gun adapter, and hand-tighten the collar. |

|
5.
|
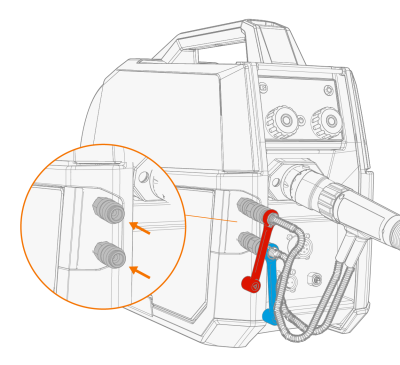
If your setup includes a water-cooled gun, connect the cooling hoses to the wire feeder. The coolant inlet hose is marked with blue and the coolant outlet hose with red color. |

|
6.
|
Dress the sharp filler wire tip before loading to improve wire loading and to lengthen consumables' lifetime. |
|
7.
|
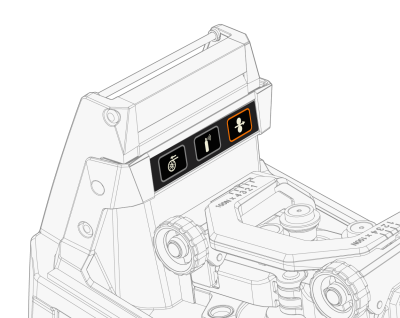
Press the Wire inch button to load the filler wire. |

|
8.
|
Trim the excess filler wire at a slight angle to improve ignition. |
|
9.
|
Check the gas flow rate. |
The welding gun is now ready for use. When not using the gun, keep it in the welding gun holder on the wire feeder.


