Screen saver
The screen saver image shown during start-up and when the control panel has been idle for a predefined time can be changed using the screen saver tool at kemp.cc/screensaver. To make the change, you'll need the image file you are planning to use and a USB memory stick.
Tools:
|
•
|
Screwdriver, Torx head (T20). |
|
2.
|
Following the on-screen instructions, upload, edit and download the new screen saver image onto a USB memory stick. |
|
3.
|
Detach the control panel from the power source: |
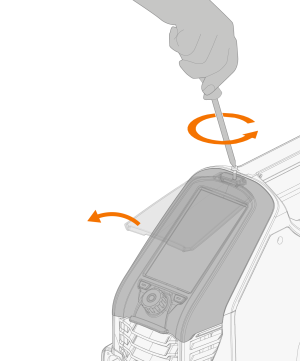
>> Remove the top screw and panel cover.
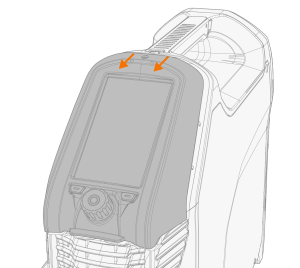
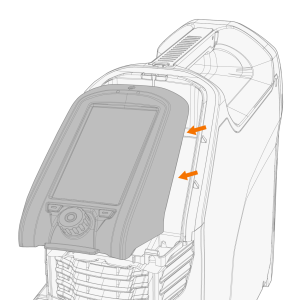
>> First pull the top of the control panel slightly and then the rest of the panel.

|
Do not disconnect the control panel cable. The power source and control panel must be turned on. |
|
4.
|
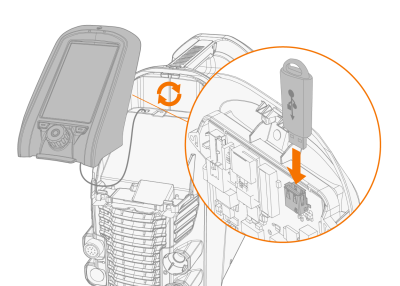
Connect the USB memory stick to the USB connector on the rear side of the control panel. The control panel detects your USB memory stick automatically and shows a list of available images. |

|
Always connect and disconnect the USB device in a straight angle to avoid any additional stress
to the USB connector. |
|
5.
|
Following the on-screen instructions, and using the control panel controls, select the image on the USB memory stick you want to use as a screen saver. |
|
6.
|
Remove the USB memory stick and install the control panel back in place. Refer to Installing control panel for more information. |
|
|
To delete a custom screen saver image from the control panel memory, or to use the Kemppi logo instead, go to Settings view. |