Installation on hollow-wrist robot
This section describes the installation of the collision sensor, cable pack, and welding torch on a hollow-wrist robot.
For instructions on connecting the cable pack to the welding equipment, refer to Connecting to welding equipment.

|
Before starting installation, ensure that the robot is in the zero position. |

|
Do not exceed the specified torque values. Over-tightening may damage the fixing accessories. |
Tools needed:


|
1.
|
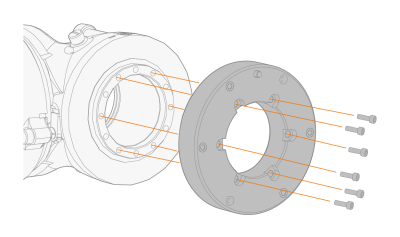
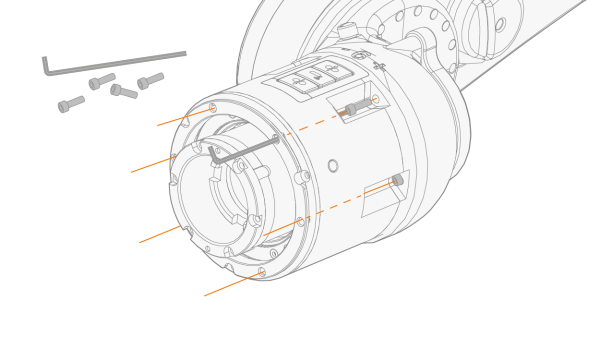
Install the adapter flange on the robot with the fixing screws. (For Nm torque, refer to the robot manufacturer's operating manual.) |
|
2.
|
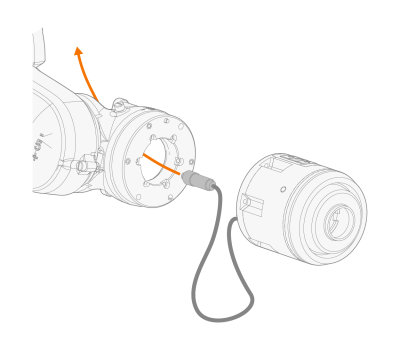
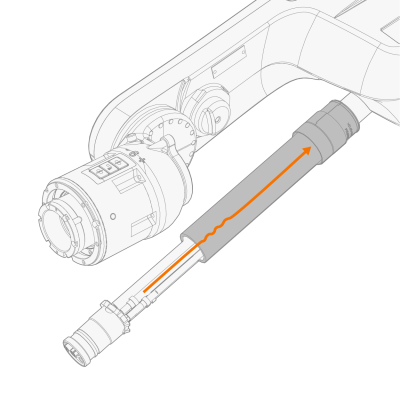
Route the collision sensor's control cable through the robot wrist. |
|
3.
|
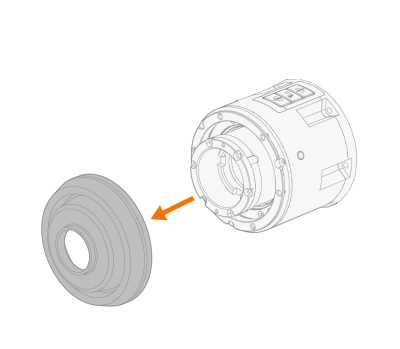
Remove the collision sensor’s protective cover before tightening the fixing screws in the next step. |
|
4.
|
Attach the collision sensor to the adapter flange using the fixing screws. Tighten to a torque of 4 Nm. |
|
|
The fixing screws can also be tightened from the side (there is no need to remove the protective cover), but the tightening method described above is preferable.
|
|
5.
|
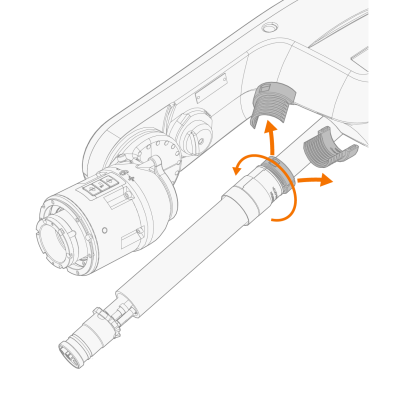
Loosen and detach the cable pack cover holder and slide the cover upward to uncover the collision sensor control cable, which will be connected in a later step. |
|
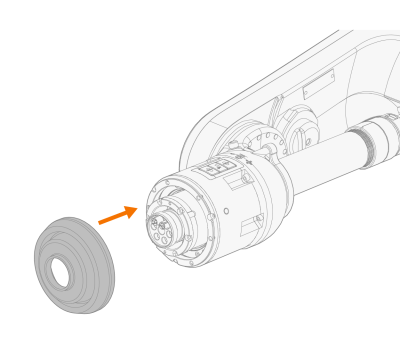
6.
|
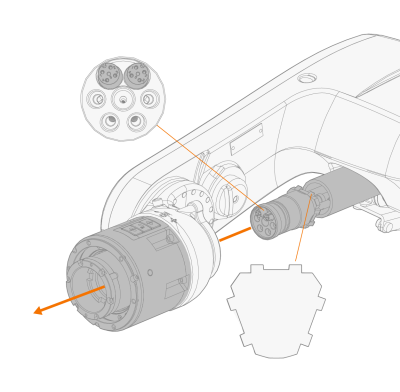
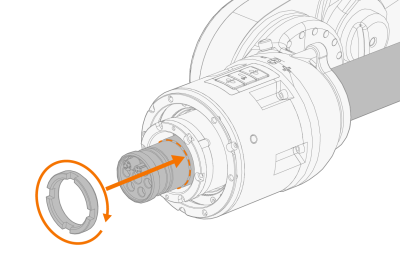
Attach the cable pack to the collision sensor. |
|
|
Note the correct position of the cable pack. The cable pack features outward-facing guiding angles that must align with the groove-like recesses on the collision sensor. |
|
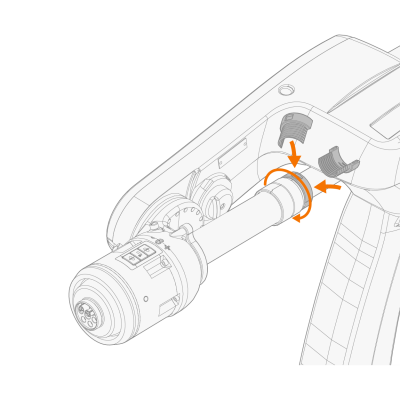
7.
|
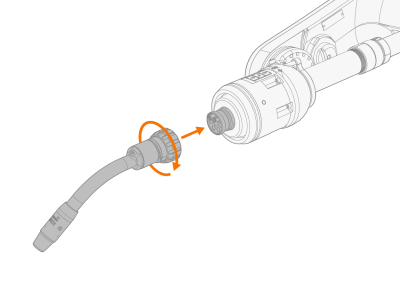
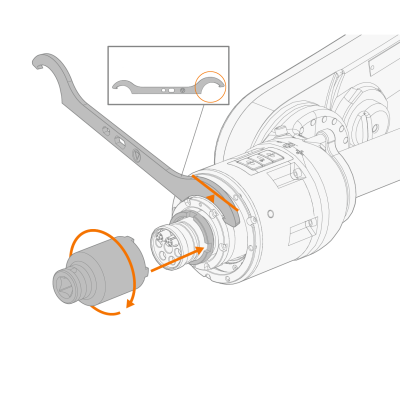
Secure the cable pack to the collision sensor with the retainer nut provided. Hand-tighten the retainer nut at this point. |
|
8.
|
Place the larger end of the hook wrench into the groove on the collision sensor and hold the sensor to prevent it from turning. Tighten the retainer nut to a torque of 50 Nm with the tightening sleeve.
|
|
9.
|
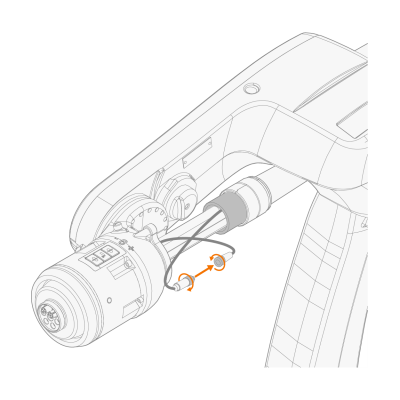
Connect the collision sensor control cable connectors between the collision sensor and the cable pack and tighten by turning. |
|
10.
|
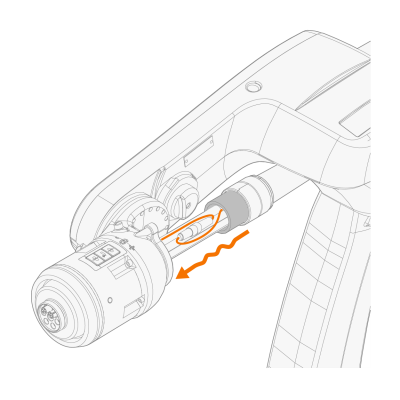
Bundle the excess length of the control cable into a neat loop and slide the cover back in place, making sure all cables are securely enclosed. |
|
11.
|
Replace the cover holder and hand-tighten. |
|
12.
|
Reattach the collision sensor's protective cover. |
|
13.
|
If you want to use the wire brake, install it before connecting the welding torch. Refer to Installing wire brake. |
|
14.
|
Connect the welding torch to the cable pack and tighten the collar properly. |
|
|
Before connecting, ensure that the connectors align correctly. |