Navigation
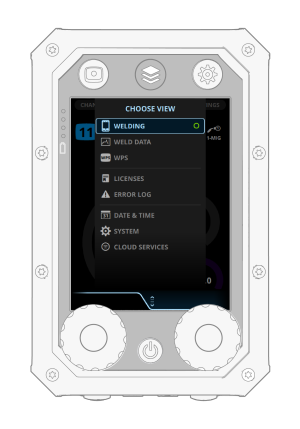
Above the display, Control Pad has three view buttons. Press these buttons to change the view on Control Pad's display. Press the Menu button twice to open the View menu.
Use the knobs under the display to move in the display and to adjust the values. When there is a green light in the center of the knob, the knob also functions as a push button.
Figure: The View menu:
In the Welding view, adjust the welding power with the left knob and the fine tuning with the right knob. In most welding processes, this secondary parameter is voltage.
In all other views, move up and down in the menus with the right knob. Press the green button in the center of the knob to open an item.
If you need to perform a reversing action, such as Cancel or Default, press the green button to accept.
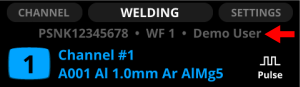
Header and footer
Control Pad's header displays the serial number of the welding machine, the selected wire feeder, and the name of the user:
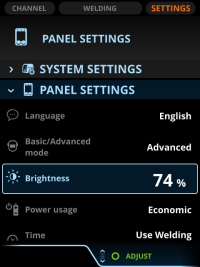
There is an instruction on the footer above the knob, when the knob has a specific function. A green circle in the footer prompts the push of the button on the control knob. The adjustable parameter or value in focus is highlighted with orange.
Figure: Control Pad display with the Adjust footer / Control Pad display with the Select footer:
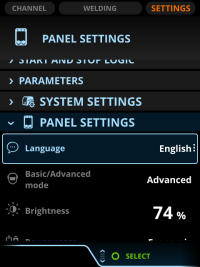
If the selection of the toggle button comes into effect right away, the footer command is Close. If the change comes into effect after pressing the green button, the footer command is OK.