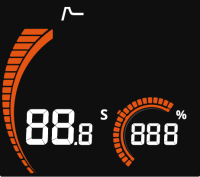
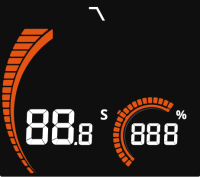
Additional welding parameters
To access the additional welding parameters, including Hot start, Crater fill and Post current adjustments (start and stop parameters) and water cooling setting (optional), press the welding parameters button on the right of the X3 control panel display.
The parameters available for adjustment depend on the selected process and/or welding mode.

|
The Pulse MIG process is available only with a pulse power source. |
Hot start
1-MIG (A)
Pulse MIG MMA Gouging
Hot start is a welding function that uses higher or lower wire feed speed and welding current at the start of the weld. After the Hot start period the current changes to normal welding current level. This facilitates the start of the weld especially with aluminum materials.
To adjust Hot start:
|
1.
|
Press the welding parameters button to enter the welding parameters menu. |
|
2.
|
Turn the right control knob until the Hot start icon is underlined. |

|
3.
|
Select Hot start for adjustment by pressing the right control knob. |
|
4.
|
Turn the right control knob to turn Hot start ON or OFF and press the control knob button to select. |
|
5.
|
If Hot start is on: Adjust the Hot start time (s) by turning the right control knob. Confirm the set value by pressing the right control knob. |
|
6.
|
If Hot start is on: Once the Hot start time is set, adjust the Hot start level (%) by turning the right control knob. Confirm the set value by pressing the right control knob. |
Hot start time (1-MIG):
|
•
|
Adjustment range: 0.1...10.0 s |
|
•
|
Adjustment steps: 0.1 s |
|
|
Hot start time setting is not available with 4T trigger logic. Refer to Trigger logic functions for more information. |
Hot start level (1-MIG):
|
•
|
Adjustment range: 50...200 % |
Hot start adjustment (MMA, Gouging):
|
•
|
Adjustment range: -30...+30 |
|
|
In MMA and Gouging, the Hot start adjustment is a combined fine tuning value relative to the default setting. |
Crater fill
1-MIG (A)
Pulse MIG
When welding with high power, a crater is usually formed at the end of the weld. The Crater fill function decreases the welding power / wire feed speed at the end of the welding job so that the crater can be filled using a lower power level.
To adjust Crater fill:
|
1.
|
Press the welding parameters button to enter the welding parameters menu. |
|
2.
|
Turn the right control knob until the Crater fill icon is underlined. |

|
3.
|
Select Crater fill for adjustment by pressing the right control knob. |
|
4.
|
Turn the right control knob to turn Crater fill ON or OFF and press the control knob button to select. |
|
5.
|
If Crater fill is on: Adjust the Crater fill time (s) by turning the right control knob. Confirm the set value by pressing the right control knob. |
|
6.
|
If Crater fill is on: Once the Crater fill time is set, adjust the Crater fill end level (%) by turning the right control knob. Confirm the set value by pressing the right control knob. |
Crater fill time:
|
•
|
Adjustment range: 0.1...10.0 s |
|
•
|
Adjustment steps: 0.1 s |
Crater fill end level:
|
•
|
Adjustment range: 10...150 % |
Post current
MIG (M) 1-MIG (A) Pulse MIG
Post current setting affects the wire length at the weld end, for example to prevent the wire from stopping too close to the weld pool. This also enables the optimum wire length for the start of the next weld.
To adjust Post current (PC):
|
1.
|
Press the welding parameters button to enter the welding parameters menu. |
>> In manual MIG process, Post current is selected directly for adjustment.
|
2.
|
1-MIG and Pulse MIG only: Turn the right control knob until the rightmost (empty) welding parameter menu item is underlined. |

|
3.
|
1-MIG and Pulse MIG only: Select Post current for adjustment by pressing the right control knob. |
|
4.
|
Adjust Post current by turning the right control knob. Confirm the set value by pressing the right control knob. |

|
•
|
Adjustment range: -30...+30 |
Water cooling setting (optional)
MIG (M) 1-MIG (A) Pulse MIG
To enable or disable water cooling, long-press the welding parameters/water cooling button and turn the right control knob to change the setting. Confirm the setting by pressing the right control knob.

|
•
|
Adjustment range: OFF/Aut/ON (Aut = Automatic) |
When ON is selected, the coolant is circulated continuously, and when "Aut" is selected, the coolant is circulated automatically only during welding.