Installing equipment on X3T2 trolley (optional)
X3T2 is an optional 2-wheel trolley for X3 FastMig.
In addition to this instruction, refer also to the installation instructions delivered with the trolley.

|
The water-cooled multi-voltage power sources are not compatible with the X3T2 trolley due to their height. The X3GT2 2-wheel trolley can be used instead. |
|
|
The X3 HD300 wire feeder can be installed on top of the power source using the wire feeder mounting plate. This method is not applicable with X3 HD200 wire feeder. |
Tools needed:

|
|
|
The power source can be installed with the trolley bottom plate already attached to the trolley frame, or so that the trolley bottom plate is first attached to the power source and the assembly is then lifted on the trolley. |
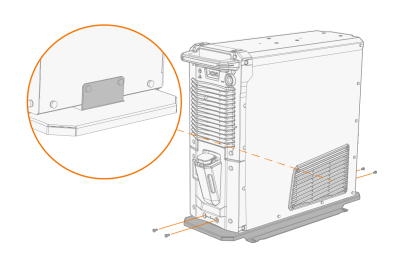
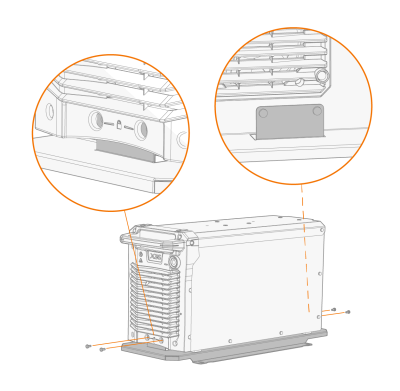
| 1. | Lift the power source on the trolley's bottom plate so that the fixing brackets align with the fixing holes. Secure the power source to the bottom plate with the screws provided (2 x M5x12 screws in the front, 2 x M5x12 screws in the rear). |
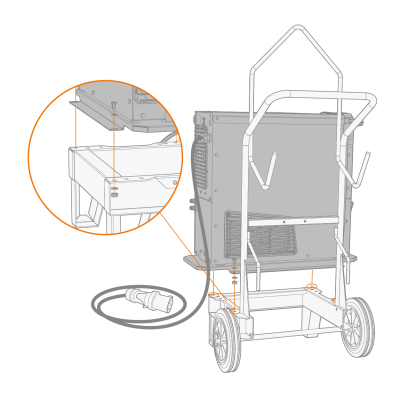
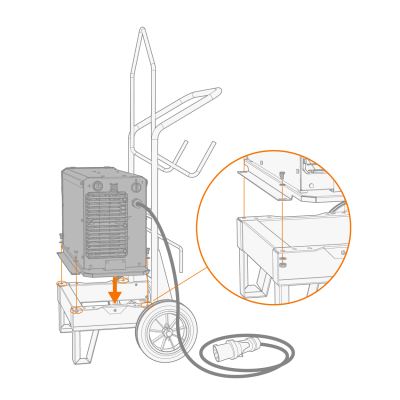
| 2. | If the power source was installed separately on the trolley bottom plate in the previous step: Lift the power source and trolley bottom plate assembly on top of the trolley and secure the assembly to the trolley through each corner of the bottom plate. Use the bolts (4 x M8x12), nuts (4 x M8) and washers (8 x M8) provided with the trolley. |
| 3. | If installing the taller power source model (with the integrated cooling unit): Attach the fixing plate supports to the trolley frame according to the unit height. Secure the fixing plates in place from the rear with the bolts provided (2 x M6x16 bolts and 2 x M6 washers). |
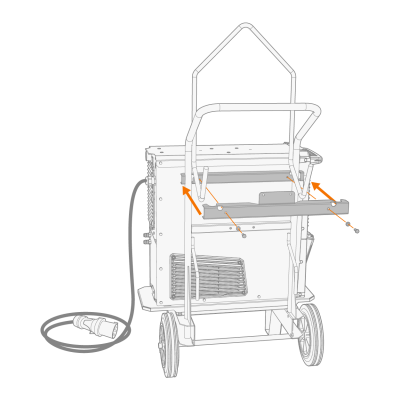
| 4. | Place the top support plate on the power source and secure it in place from the rear with the bolts provided (2 x M6x16 bolts and 2 x M6 washers) through the fixing plates. |
| 5. | Secure the top support plate to the power source with the screws provided (3 x M6x16 and 3 x M6 washers). |
|
|
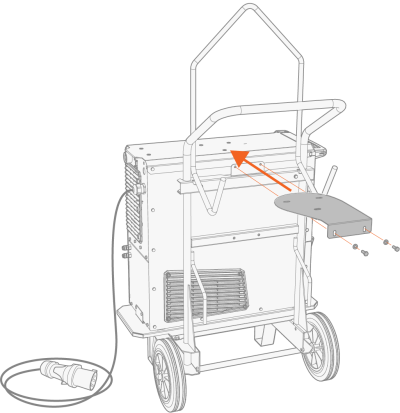
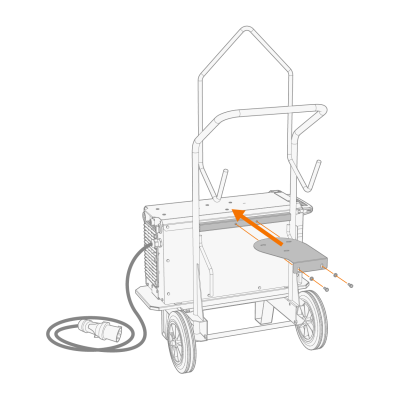
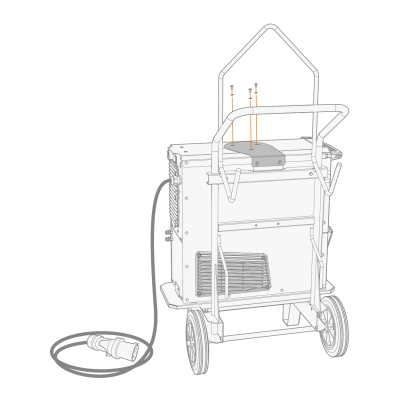
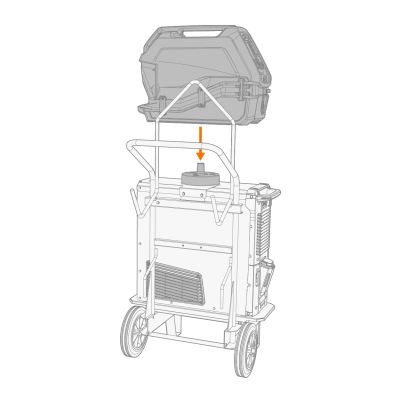
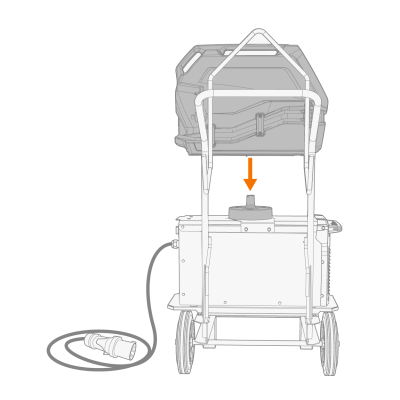
For the stacked wire feeder installation, install also the wire feeder mounting plate on the power source at this stage. The mounting plate uses the same fixing points with the top support plate. |
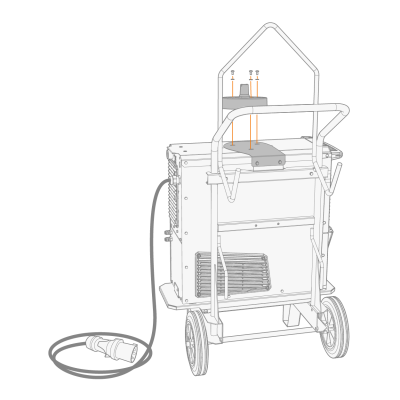
| 6. | Lift the wire feeder on top of the power source, on the mounting plate. |
>> Refer to Installing wire feeder with mounting plate (X3 WF HD300) for more information.

|
The wire feeder must be secured to the mounting plate shaft to ensure safe operation. |