Installing gas bottle and testing gas flow

|
Handle gas bottles with care. There is a risk of injury if the gas bottle or the bottle valve is damaged! |

|
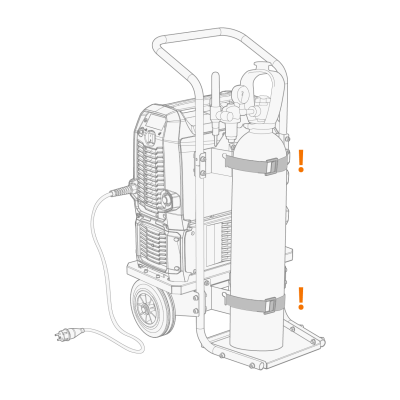
Always secure the gas bottle properly in an upright position to a special holder on the wall or on the welding equipment cart. Always keep the gas bottle valve closed when not welding. |

|
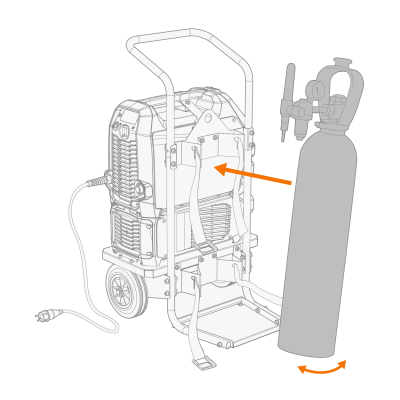
- If a cart with a gas bottle rack is used, install the gas bottle on the cart first, then make the connections.
- The maximum recommended size of the gas bottle to be installed on the T22M cart is 20 liters.
- Install the welding torch to the power source before installing and testing the gas bottle.
|
Contact your local Kemppi dealer for choosing the gas and the equipment.
|
1.
|
Without gas bottle cart:Place the gas bottle in a suitable, secure location. |
|
2.
|
With gas bottle cart:Move the gas bottle on the transport unit's gas bottle rack and secure it in place with the straps and fixing points provided. |
|
4.
|
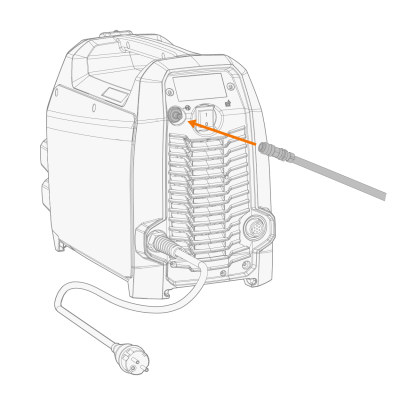
Connect the gas hose to the power source. |
|
5.
|
Open the gas bottle valve. |
|
6.
|
Start gas test by long-pressing the control panel's control knob button in the main view. |
|
|
By default, the gas test time is 20 s. During the gas test, you can adjust the time (between 0 ... 60 s, step 1 s) by turning the control knob. |
|
|
You can end the gas test by pressing the control knob button. |
|
7.
|
Check and adjust the gas flow. Use an external flow meter and regulator for measuring and adjustment. |