Installing cooling unit

|
Only an authorized electrician is allowed to install the cooling unit. |
|
|
Do not connect the equipment to the mains before the installation is complete. |

|
Do not attempt to move the power source with a hoist from its handle. The handle is meant for manual lifting only. |

|
When a transport cart is used, refer also to Mounting units on cart (optional). |
Tools:
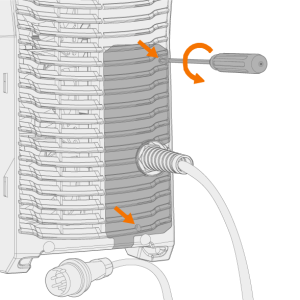
| • | Screwdriver, Torx head (T20). |
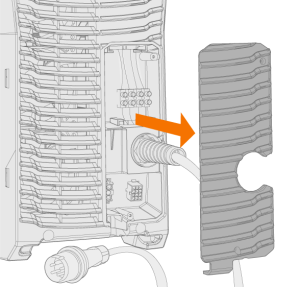
| 1. | Remove the power source's rear cover. |
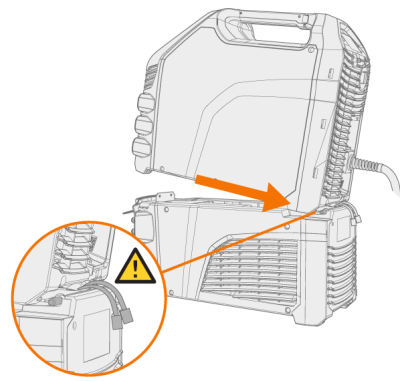
| 2. | Move the power source on top of the cooling unit so that the bar in the rear goes into the rear connection interface and lower the front onto the front connection interface. Secure the power source from the front with the screws provided. |
|
|
Ensure that the cooling unit’s connection cables don't get caught between the units and get damaged in the process. |

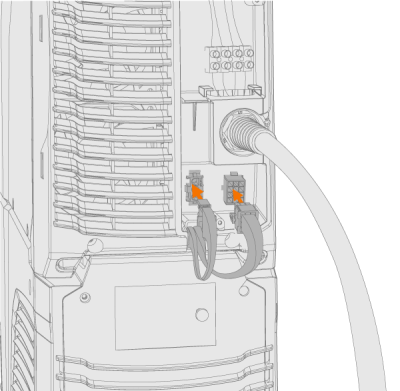
| 3. | Connect the cooling unit cables and put the rear cover back. |
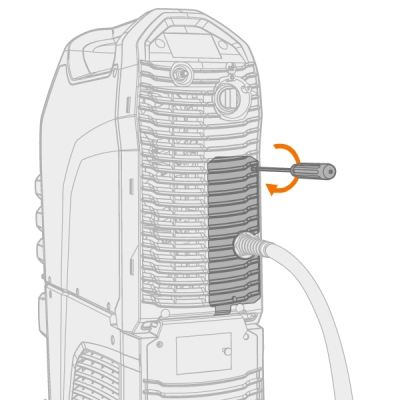
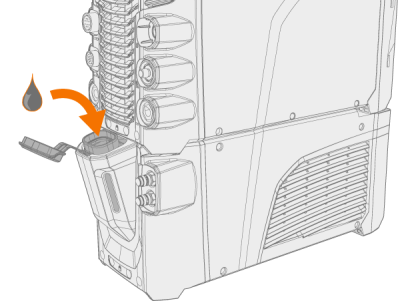
| 4. | Fill the cooling unit with cooling liquid. |
>> MasterTig Cooler M tank volume is 3 litres and the recommended coolant is MPG 4456 (Kemppi mixture). The mixing ratio should be 20...50% as standard. Use only ethylene or propylene glycol mixture intended for welding cooling systems, for example Kemppi cooling liquid.

|
Do not add water to the pre-mixed coolant solution. Do not use automotive cooling solutions or ethanol-based mixtures. |

|
Avoid cooling liquid contact with skin or eyes. In case of an injury, seek for medical advice. |