Installing remote control
Remote controls are optional. To enable remote operation, set the Remote control mode in the control panel settings (refer to Settings view).

|
When the Remote mode is selected on the control panel, and both wireless and wired remotes are connected, the wired remote will be used. |
|
|
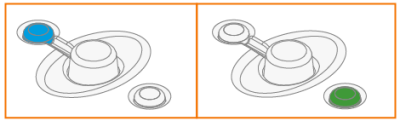
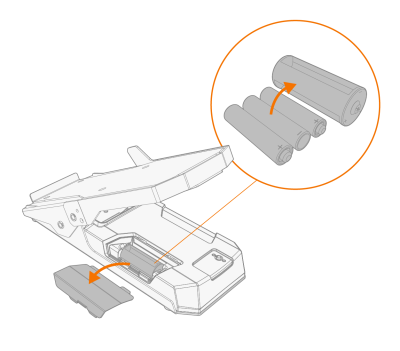
Refer to the (+) and (-) signs on the battery holder and in the remote for the correct positioning of batteries.
 |
Tools:
|
•
|
Screwdriver, Torx head (T15). |
Wireless hand remote control (HR45)
|
1.
|
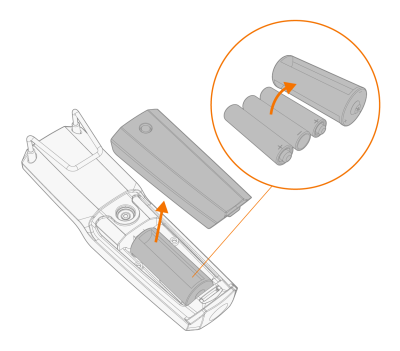
Take the remote control battery holder out. Install the batteries (3 x AAA) and put the holder back into the remote. |
|
2.
|
Turn on the Wireless remote in the control panel settings (refer to Settings view). |
|
3.
|
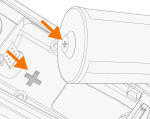
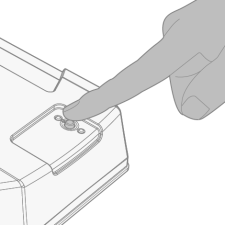
Keeping the wireless remote close to the power source, long press (3 sec.) the wireless remote pairing button on the remote. |
|
4.
|
Once connected, the blue LED on the left of the connection button is lit. The green LED blinks when the battery is low. |
|
5.
|
To enable remote operation, select Remote mode in the control panel settings. |
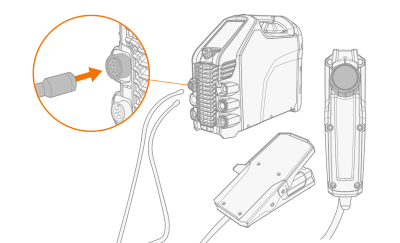
Remote control with cable (HR43, FR43)
|
1.
|
Connect the remote control cable to the power source. |
Wireless foot pedal (FR45)
|
|
Refer to the (+) and (-) signs on the battery holder and in the remote for the correct positioning of batteries. |
|
1.
|
Take the foot pedal battery holder out. Install the batteries (3 x AAA) and put the holder back into the foot pedal. |
|
2.
|
Turn on the Wireless remote in the control panel settings (refer to Settings view). |
|
3.
|
Keeping the wireless remote close to the power source, long press (3 sec.) the wireless remote pairing button on the foot pedal. |
|
4.
|
Once connected, the blue LED next to the button is lit. The green LED blinks when the battery is low. |
| Tip: You can set minimum and maximum values for the remote current adjustment in the control panel settings. |