Using WeldEye App
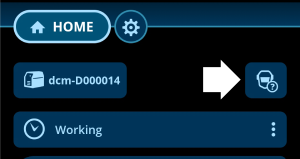
Selecting user (welder)
|
1.
|
Click the welder icon. |
|
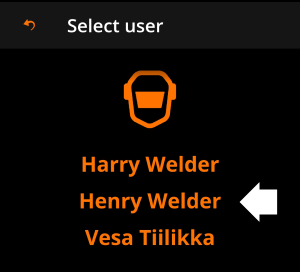
2.
|
Select the user (welder) on the list. |
Selecting reason code
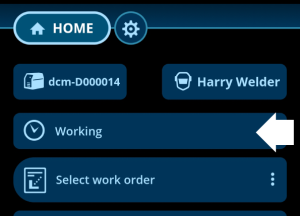
By default, WeldEye App uses 'Working' as a reason code to describe the current status. With this selection, it is also possible to report breaks etc., as applicable.
|
1.
|
Click the reason code row. |
|
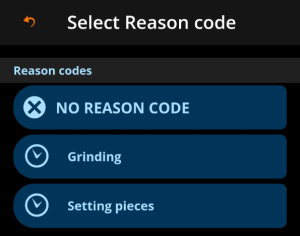
2.
|
Select a reason code best suited for the current situation. |

|
The selected reason code is applied immediately once selected and a time counter is started. No reason code returns the status to 'Working'. |
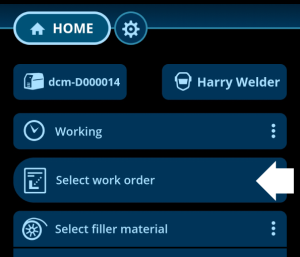
Selecting work order
|
1.
|
Click Select work order. |
|
2.
|
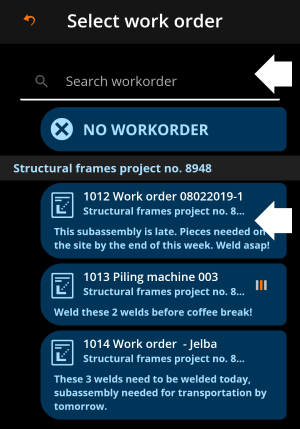
Search and/or choose a work order on the work order list. |
|
3.
|
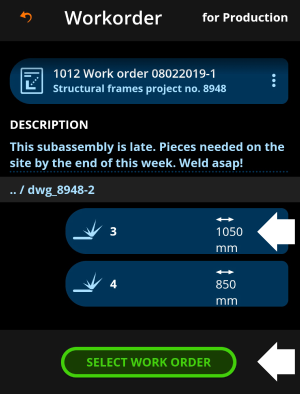
Choose a weld on the work order or click Select work order to continue without selecting a specific weld. If a Welding Procedure Specification (WPS) is saved for the selected weld, the WPS is automatically activated. |
Selecting Welding Procedure Specification (WPS)
|
|
It is advisable to select the Welding Procedure Specification (WPS) before choosing the filler wire and/or the shielding gas used. Recommendations for both are then sourced from the WPS. |

|
2.
|
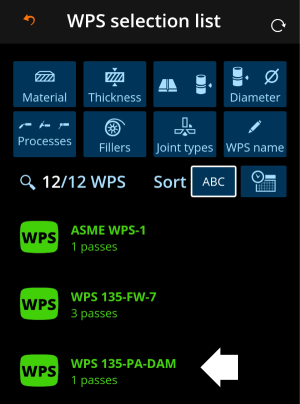
As necessary, filter the available WPSes on the list based on welded material, material thickness, joint type or welding process, for example. Sort the items in alphabetical order or based on the date. |

|
3.
|
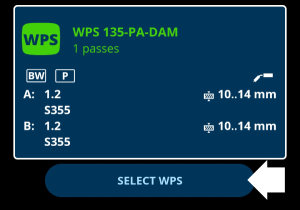
Click on a WPS to see its details and to select it. |
|
4.
|
Select the WPS by clicking Select WPS. |
The basic information of the selected WPS is also shown in the home view. For more detailed WPS information, click the info (i) symbol on the right.

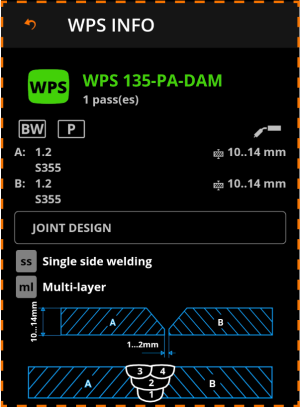
The weld pass in the selected WPS can be changed by clicking the WPS pass number in the home view.

Selecting filler material
|
1.
|
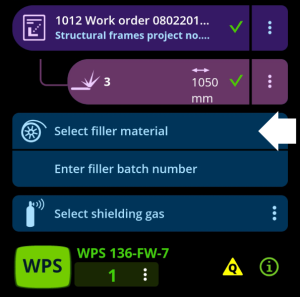
Click Select filler material. |
|
2.
|
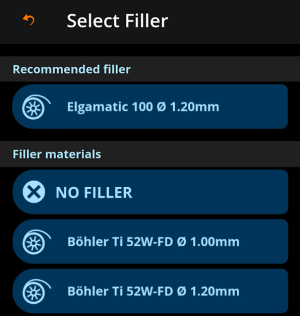
Select the filler material used. |
|
|
If a Welding Procedure Specification (WPS) is already selected, and if the WPS includes a recommendation for the filler material, the recommended filler material is shown first on the list. |
|
3.
|
Click Enter filler batch number and enter the filler material batch number manually or read the barcode with the WeldEye App. |
|
|
Adding the filler material batch information improves traceability later on. |
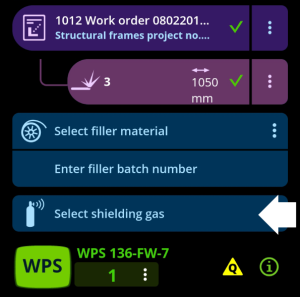
Selecting shielding gas
|
1.
|
Click Select shielding gas. |
|
2.
|
Select the shielding gas used. |
|
|
If a Welding Procedure Specification (WPS) is already selected, and if the WPS includes a recommendation for the shielding gas, the recommended shielding gas is shown first on the list. |

DCM and WeldEye App are now ready to record your welding data.
| Tip: You can always return to the home view by clicking the HOME button at the top. |