Installing cooling unit (optional)

|
The cooling unit must be installed by authorized service personnel. |
Tools needed:

Installing cooling unit
| 1. | Remove the small connector cover in the rear of the power source. |
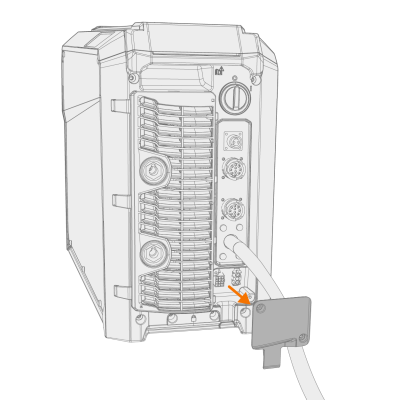
| 2. | Route the cooling unit's connection cables so that they remain accessible through the next steps. |
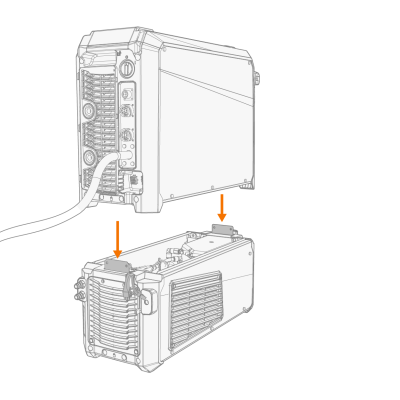
| 3. | Lift the power source on top of the cooling unit so that the fixing plates align and go into their slots. |
|
|
Ensure that the cooling unit's connection cables are not caught and/or damaged between the edges. |
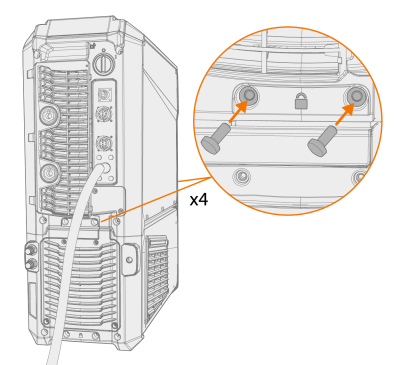
| 4. | Fix the units together with two screws in the front (M5x12) and two screws in the rear (M5x12). |
| 5. | Connect the cooling unit cables. |
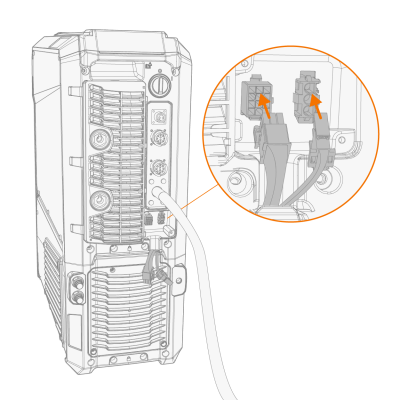

|
Do not use force, but make sure the connectors are properly connected. |
| 6. | Replace the small connector cover. |

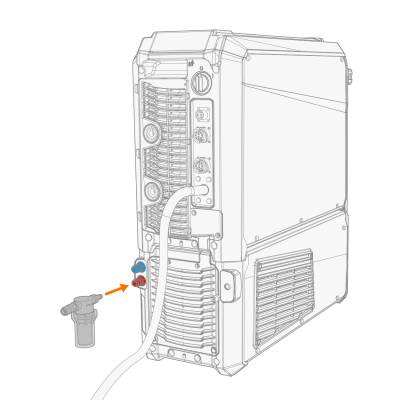
| 7. | Install the coolant filter delivered with the cooling unit to the coolant inlet connector. |